Poppyz now supports the integration with Zapier. Zapier is a website that allows two separate applications to communicate with each other. This allows Poppyz to send its data after an event takes place within your website to another application of your choice.
For example, we can capture the Purchase event of Poppyz. This means that after a customer does a purchase on your website you can decided what to do to the data sent by Poppyz to your Zap of choice. This means that the data can be sent to your newsletter and automatically subscribe the user, to your email, or to your own invoice system. There are a lot of possibilities.
To start using the integration, please make sure that you have a Zapier account and follow these steps:
- Download and install the Poppyz Zapier plugin here.
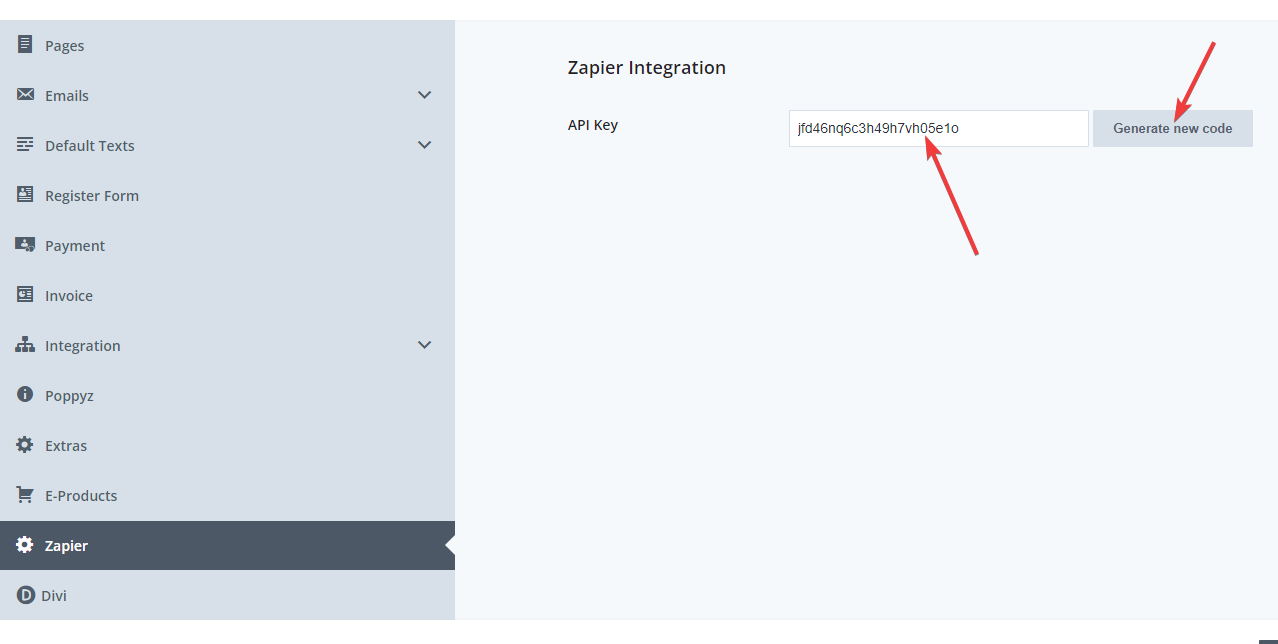
- Go to Poppyz -> Settings -> Zapier, generate a random key, and save your changes.
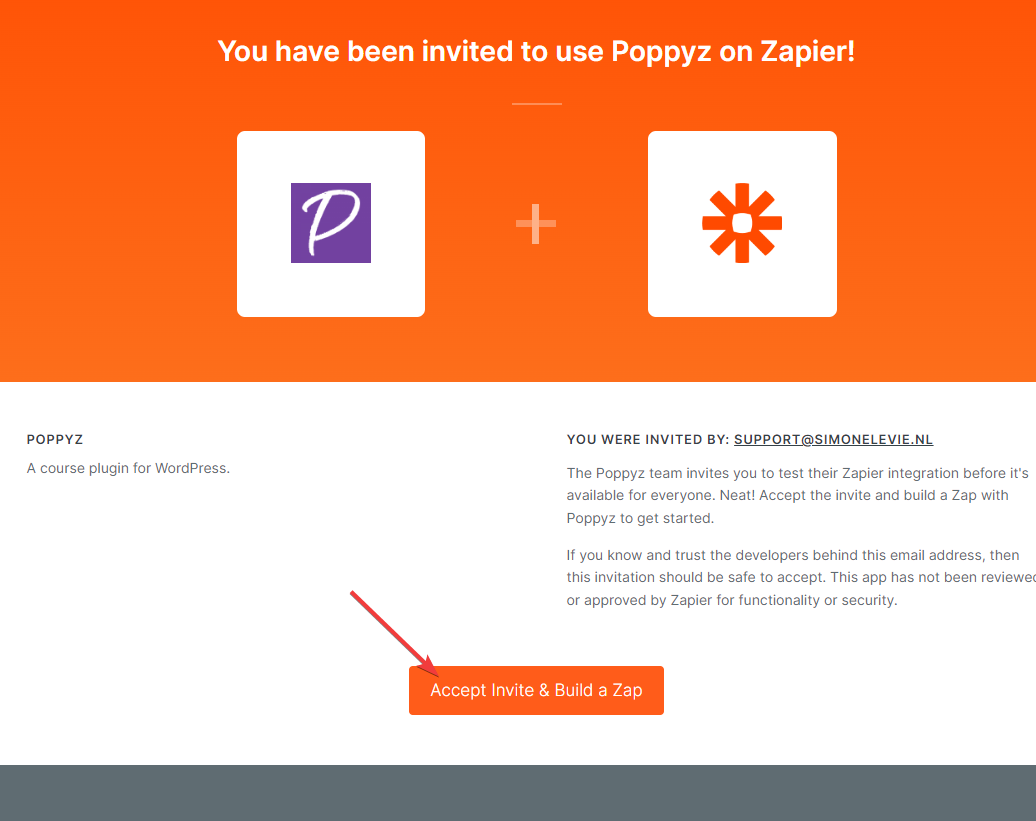
- Make sure you’re logged in to you Zapier account and click on this invite link to gain access to our Zapier app. Click on the Accept button. This is very important because the Poppyz app won’t show in your account without this step.
- Once accepted, you can now start creating your Zap. Click on the Create Zap button located on the left side of your dashboard.

- On Zap create screen search for “Poppyz“. If it does not display, make sure that you have accepted the invitation on Step 3.

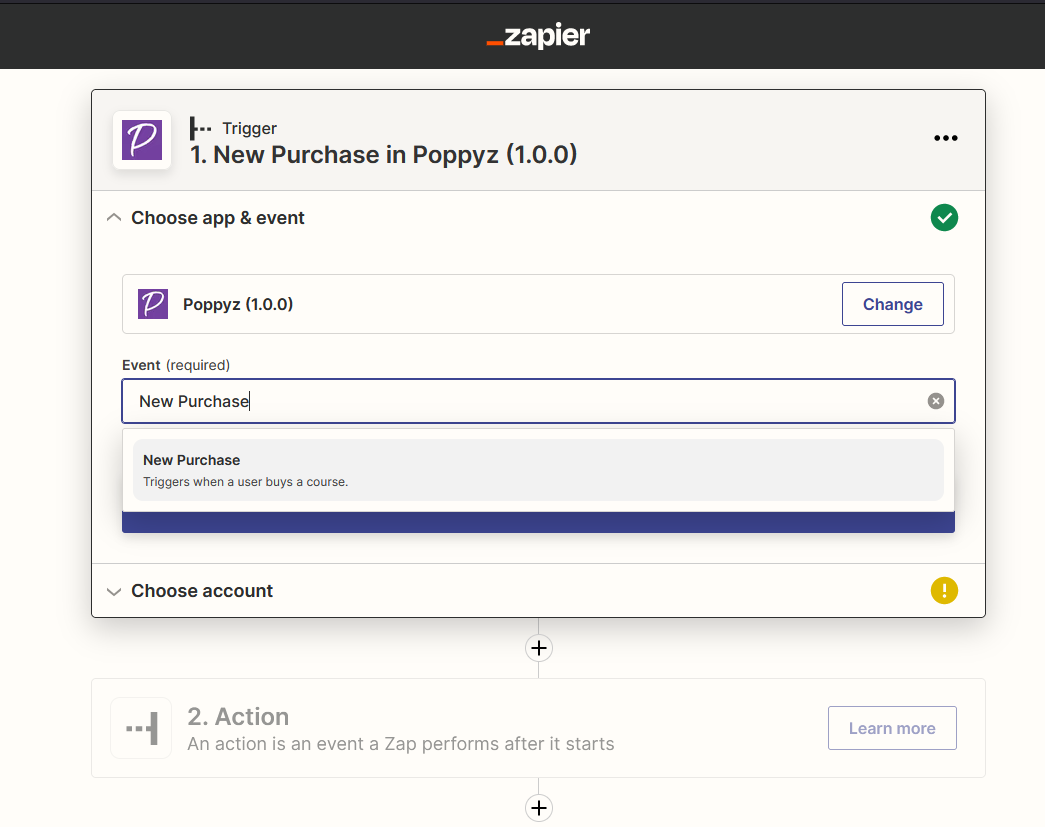
- On the next screen, select the event named “New Purchase” and click on Continue. This will allow Poppyz to send data to Zapier every time a purchase has been made.
Note: This is the only event that’s currently supported. We will be adding additional events in the future. - On the next section, you can now connect your website. A popup box will display that will ask for your website url and the random key you generated on Step 2.

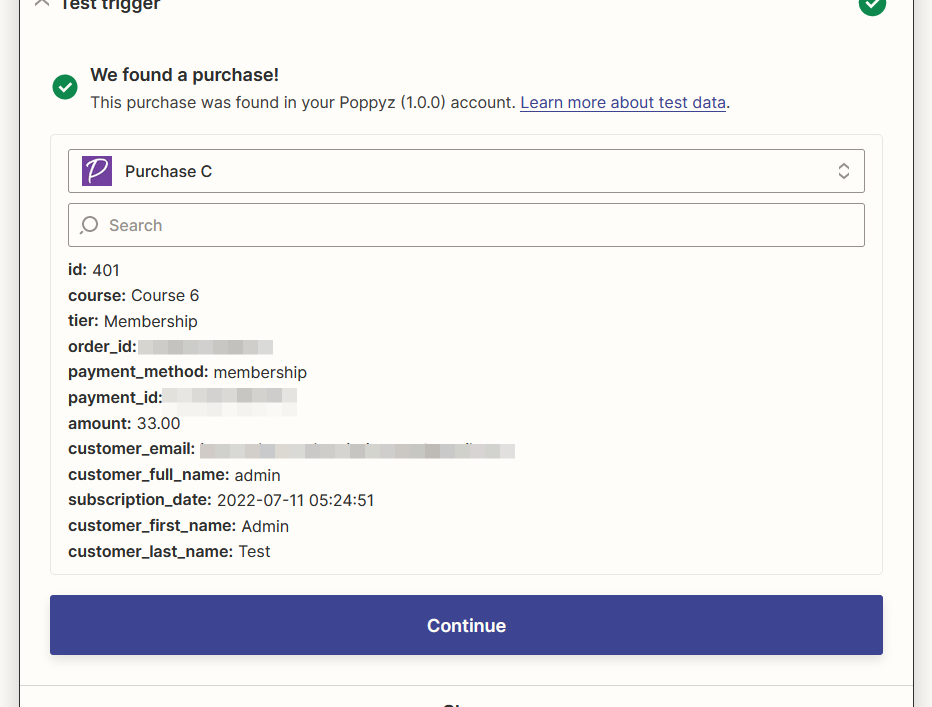
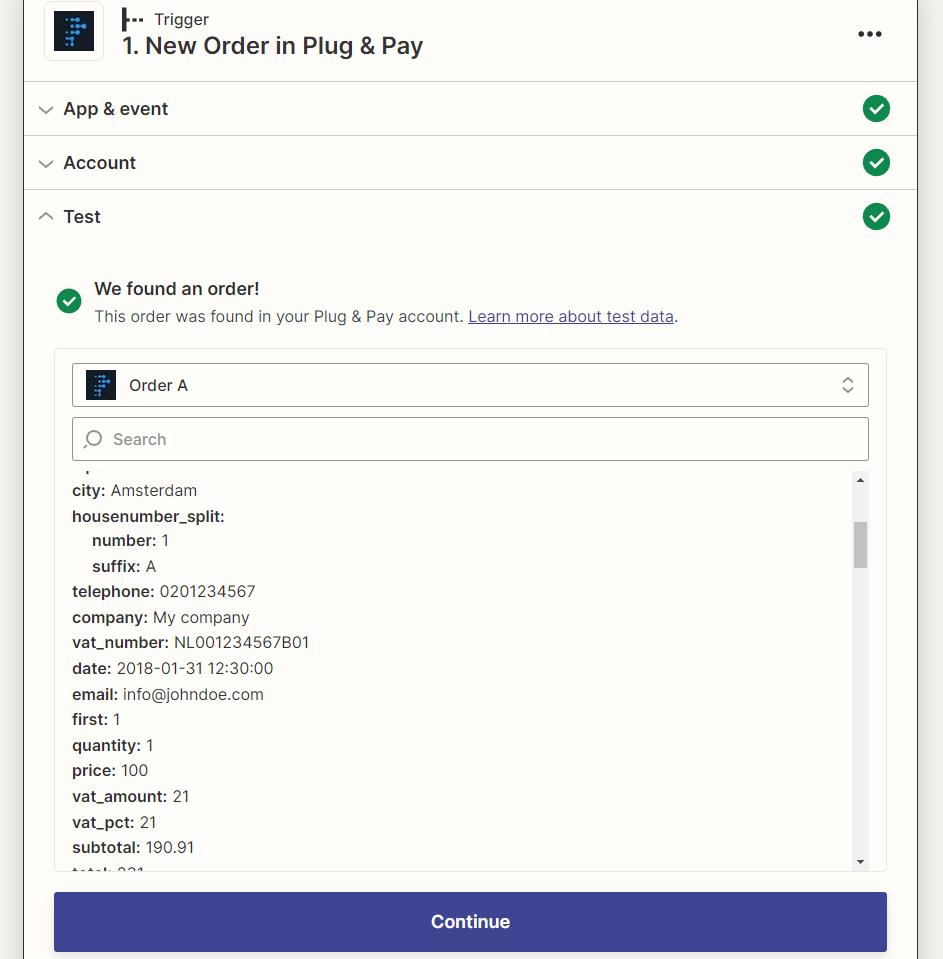
- Click on Continue, and click on the Test Trigger button. If you already have purchases on your website it should display something like the image below.
Note: If you don’t have any purchases yet you can skip this test but integration will not be complete. We recommend doing a test purchase on your website first before continuing. - Click on Continue and you will be taken to the Action page. This is now our turn to select which app we want to integrate Poppyz with. In this example we can use MailChimp.
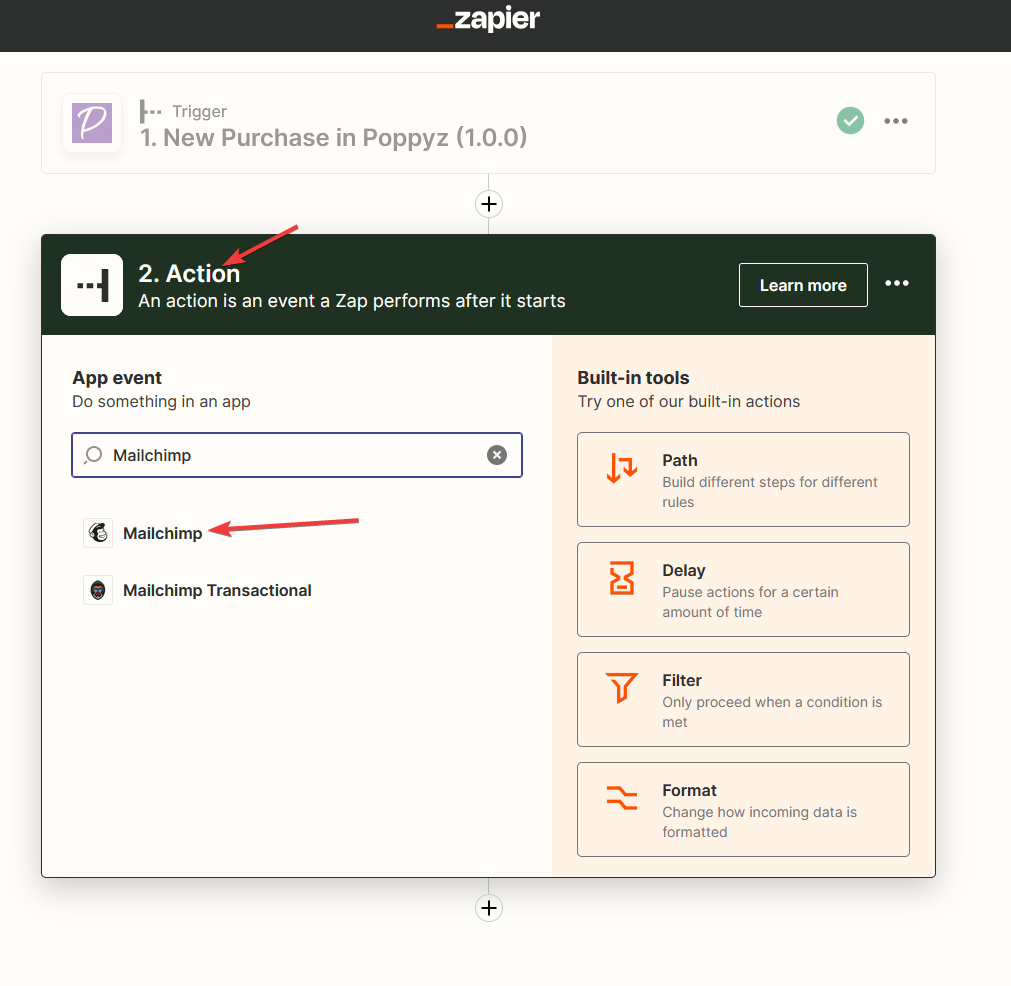
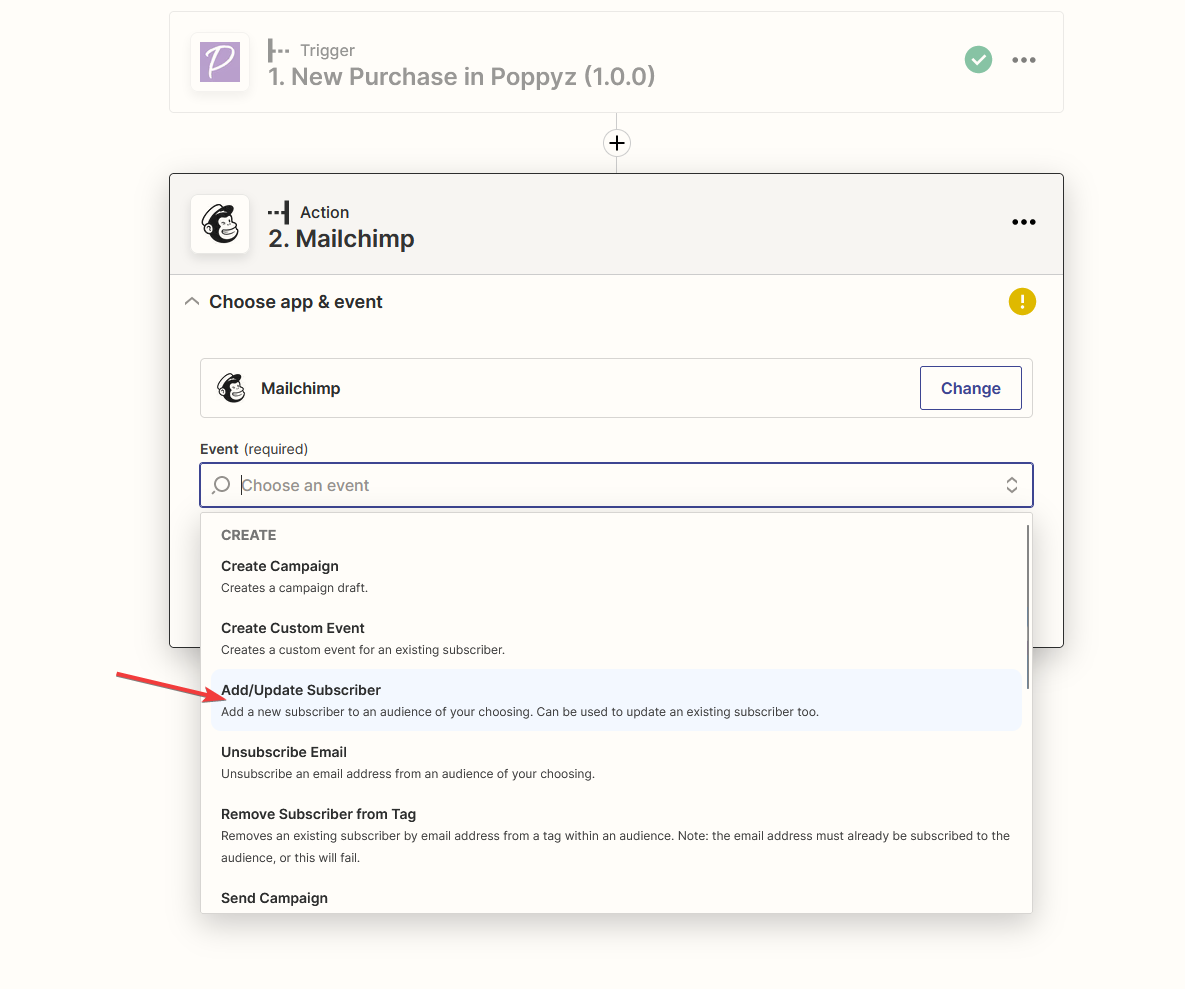
- On the next screen, choose an Event that would make sense to use based on our Poppyz’s New Purchase event. The New Purchase event sends out the order information and the information of customer who bought it. So based on this we can use the Add/Update Subscribe event in Mailchimp.
- Click on Continue and authorize Zapier to have access to your Mailchimp account by logging in and clicking on the Accept button. Once done, click on Continue.
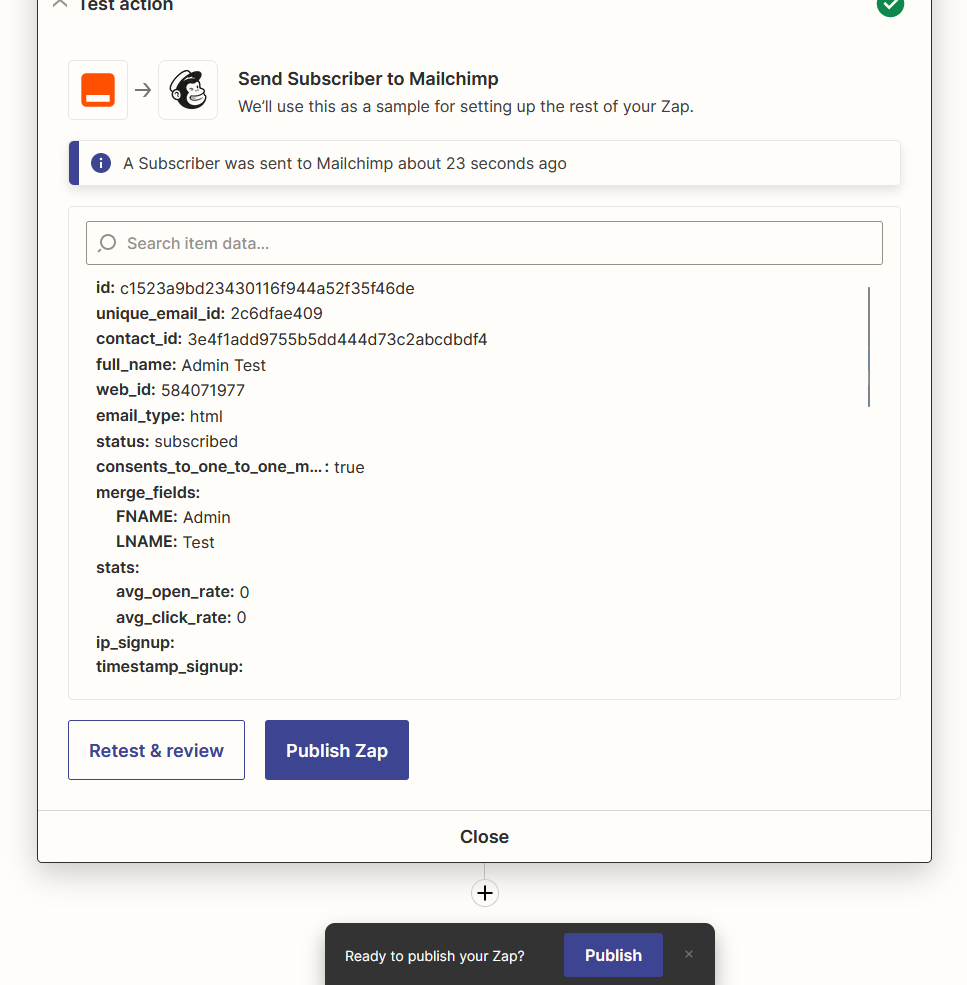
- Now we have to connect the data sent by Poppyz to Mailchimp. Enter the approriate Poppyz field data to the fields asked by MailChimp. For example, on the Subscriber Email field, choose the Customer Email field of Poppyz in the dropdown. Do the rest of the fields like First Name and Last name. When done, click on Continue and the Test Action button.

- If it’s successful you can now publish the Zap!
Poppyz – New Subscription Action
Poppyz Zapier can also be used as an Action for Zaps. This means that for example we can use it to subscribe a user to a course after a particular trigger happened on another app.
To demonstrate this we can use the Plug and Pay app’s New Purchase trigger which happens when someone purchases a product from Plug And Pay. Then the action will be Poppyz’s Create Subscription action which will subscribe the P&P Customer to a Poppyz course and create a user if it’s not yet existing.
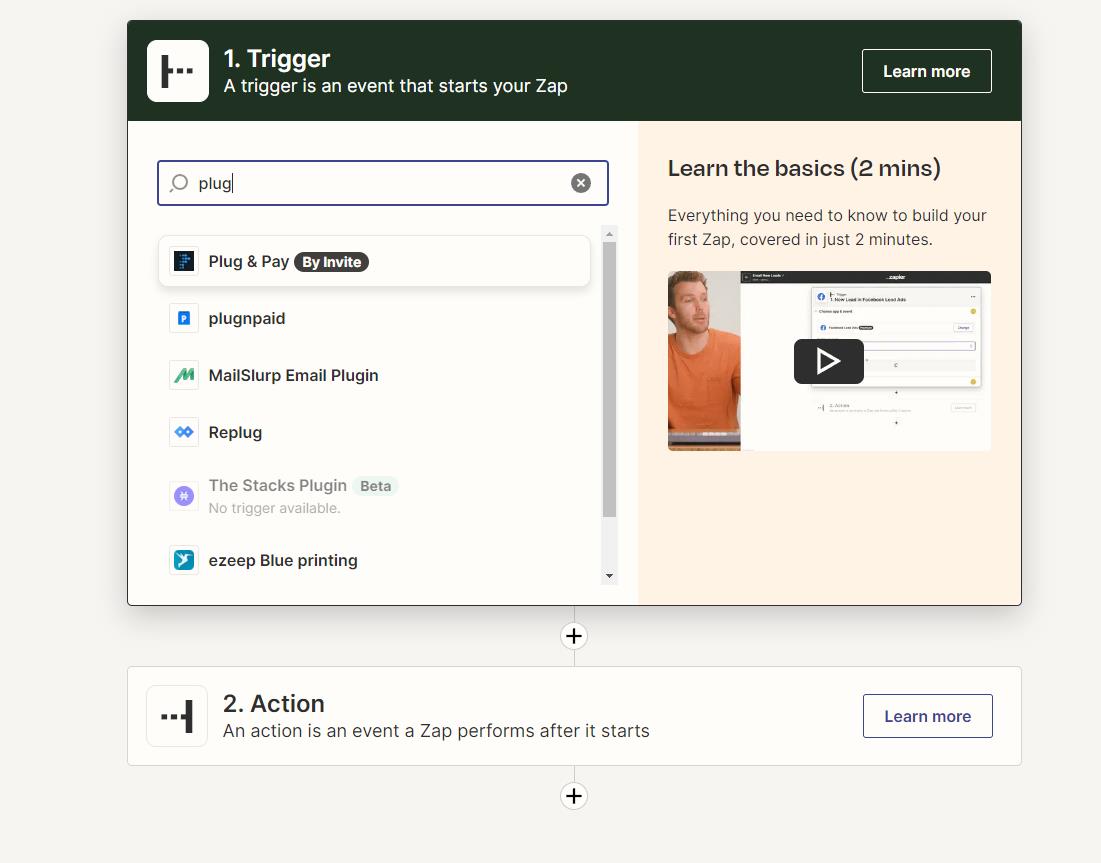
- Go to the Zapier Dashboard and click on the Create Zap button. Search for Plug and Pay. This app is by invite only so be sure to click on the invite link for it to show.
- Choose the New Order trigger and link your account.

- Test to see if it links correctly.
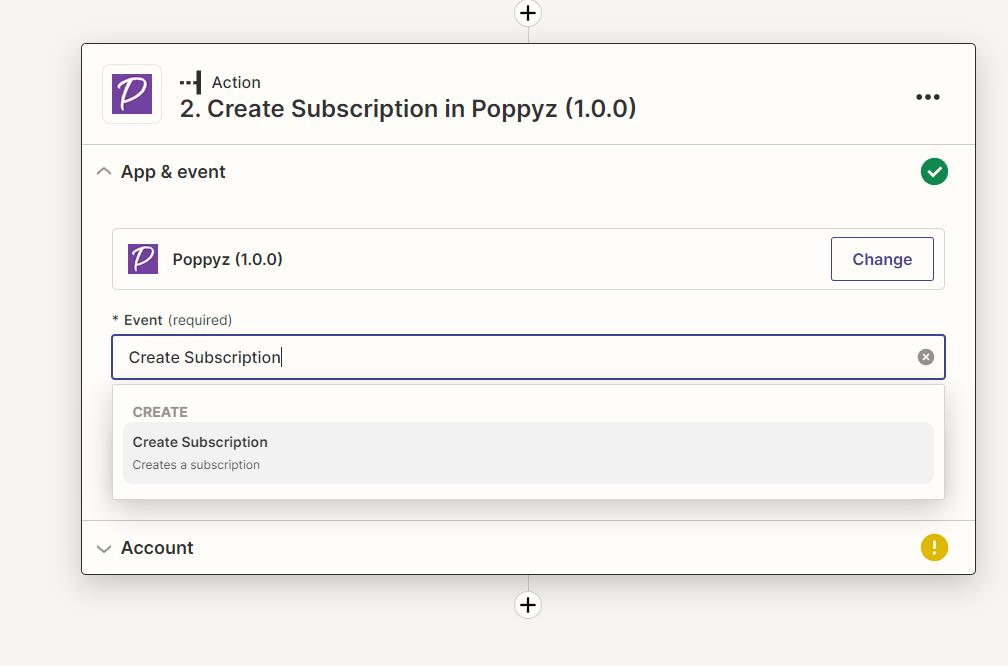
- Continue and now choose Poppyz as the Action.

- Choose Create Subscription
- Link the fields from Plug and Pay to Poppyz. The Tier ID is needed to be entered manually. It is the ID of the program that you want to be purchased.

Note: The Tier ID field can be hardcoded manually like in the example. The issue with this is that the zap will always only purchase that Tier on every purchase since it’s static. If the app you’re using supports custom fields on their products, you can create a custom field named “tier_id”, and then be able to choose that field’s value instead of hardcoding it.
- Test Action to see if it works. Done!
